
Windycast & #8212 is an optional Smarty service for connecting devices. Based on Websocket technology, it allows instant transfer of information between systems and applications.
Windycast is currently used to:
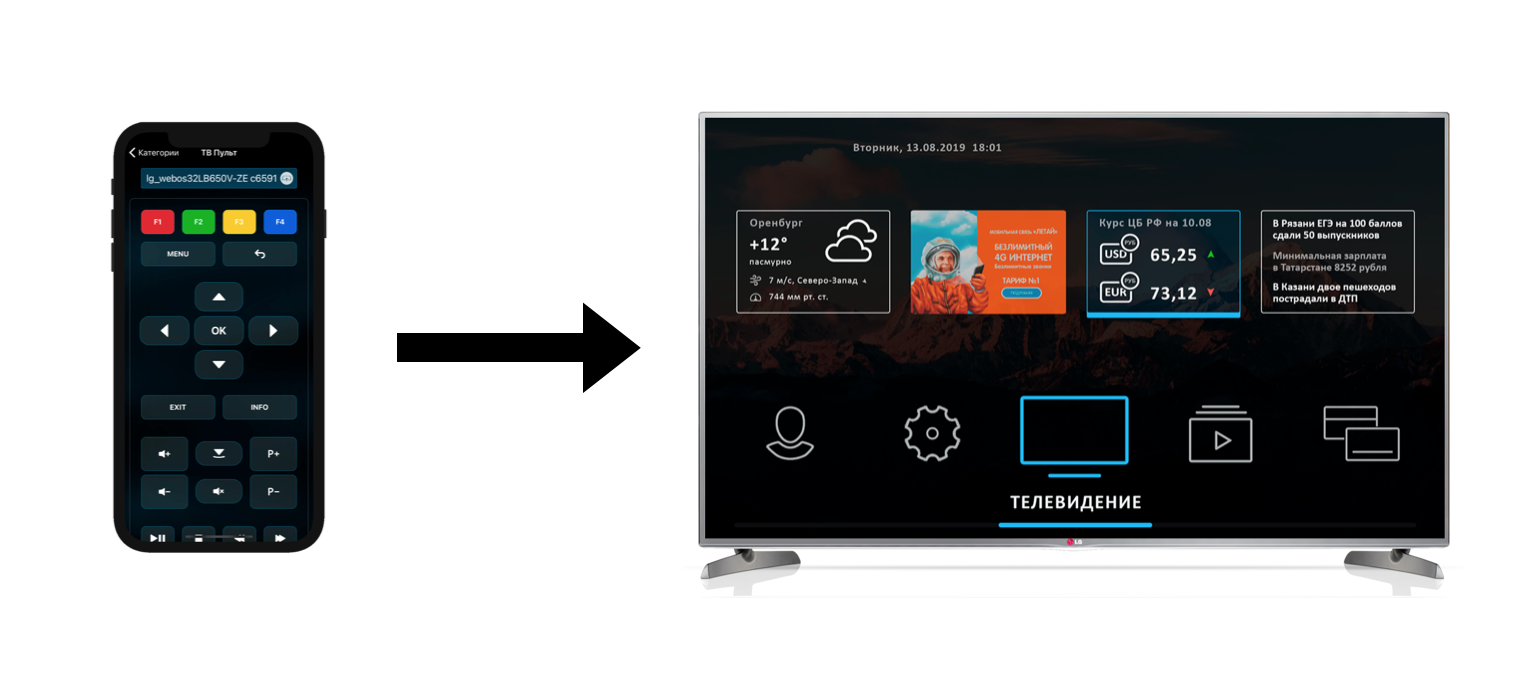
- control STB and Smart TV using the application on the smartphone;
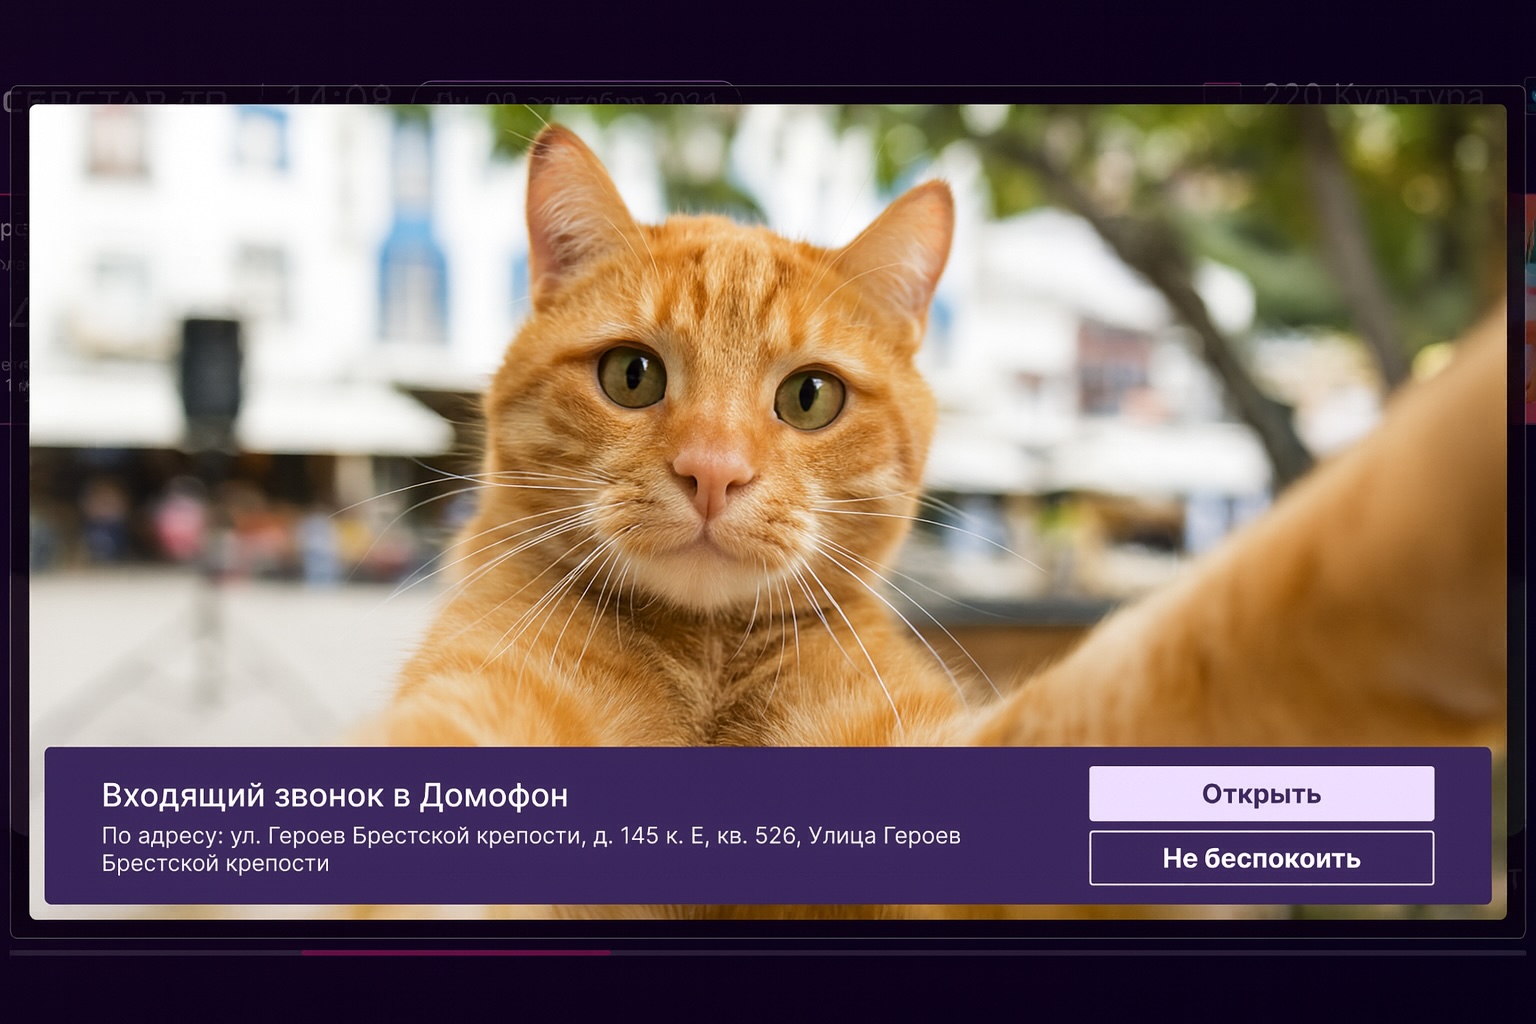
- sending and displaying intercom notifications (implemented for Sevstar, Sevstar X and Futuristic templates);
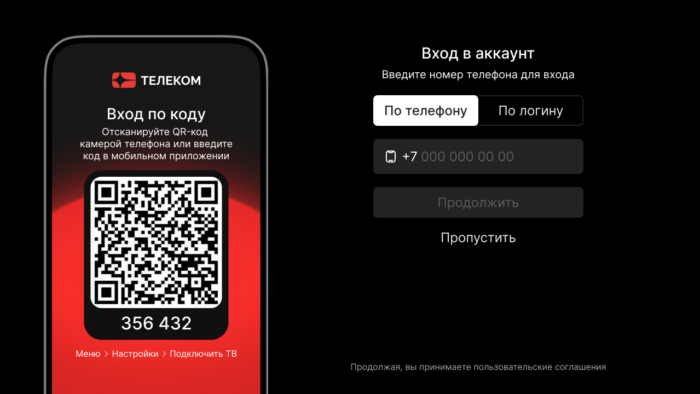
- authorization on TV by QR code.
Smartphone TV control
1. When it is turned on in the service in the mobile application, a new menu item «TV remote» appears, as well as a new icon in the channel viewing screen.


2. After clicking on it, the mobile application searches for all TVs and consoles that are now online and authorized by the same account, and gives the user the opportunity to connect to them.

3. After confirming the connection on the TV screen, it is possible to use the mobile application as a remote, or one swipe to transfer the current viewing of the channel from a mobile device to the TV screen.

Integration with the intercom system
Windycast in this integration is used as a server for instantaneous transmission of a call message from the intercom system to the device. The scenario of this integration:
1. Intercom system sends a call message to Smarty using the method http://smarty.example.com/ws_api/intercom_call/ (POST), query parameters:
account— account identifier, whose devices need to be notified of a call to the intercomcompulsory)image_url— address of constantly updated image from intercomopen_door_url— the address to which the door is openedreject_intercom_call_url— the address to which the call is cancelled
2. The message using Windycast will be delivered to the device and shown to the subscriber on the TV. The display of the video sequence is only available in the Sevstar X interface and is achieved by updating the current frame from the intercom camera by timerimage_url). In the Sevstar and Futuristic interfaces, the call is received without video.
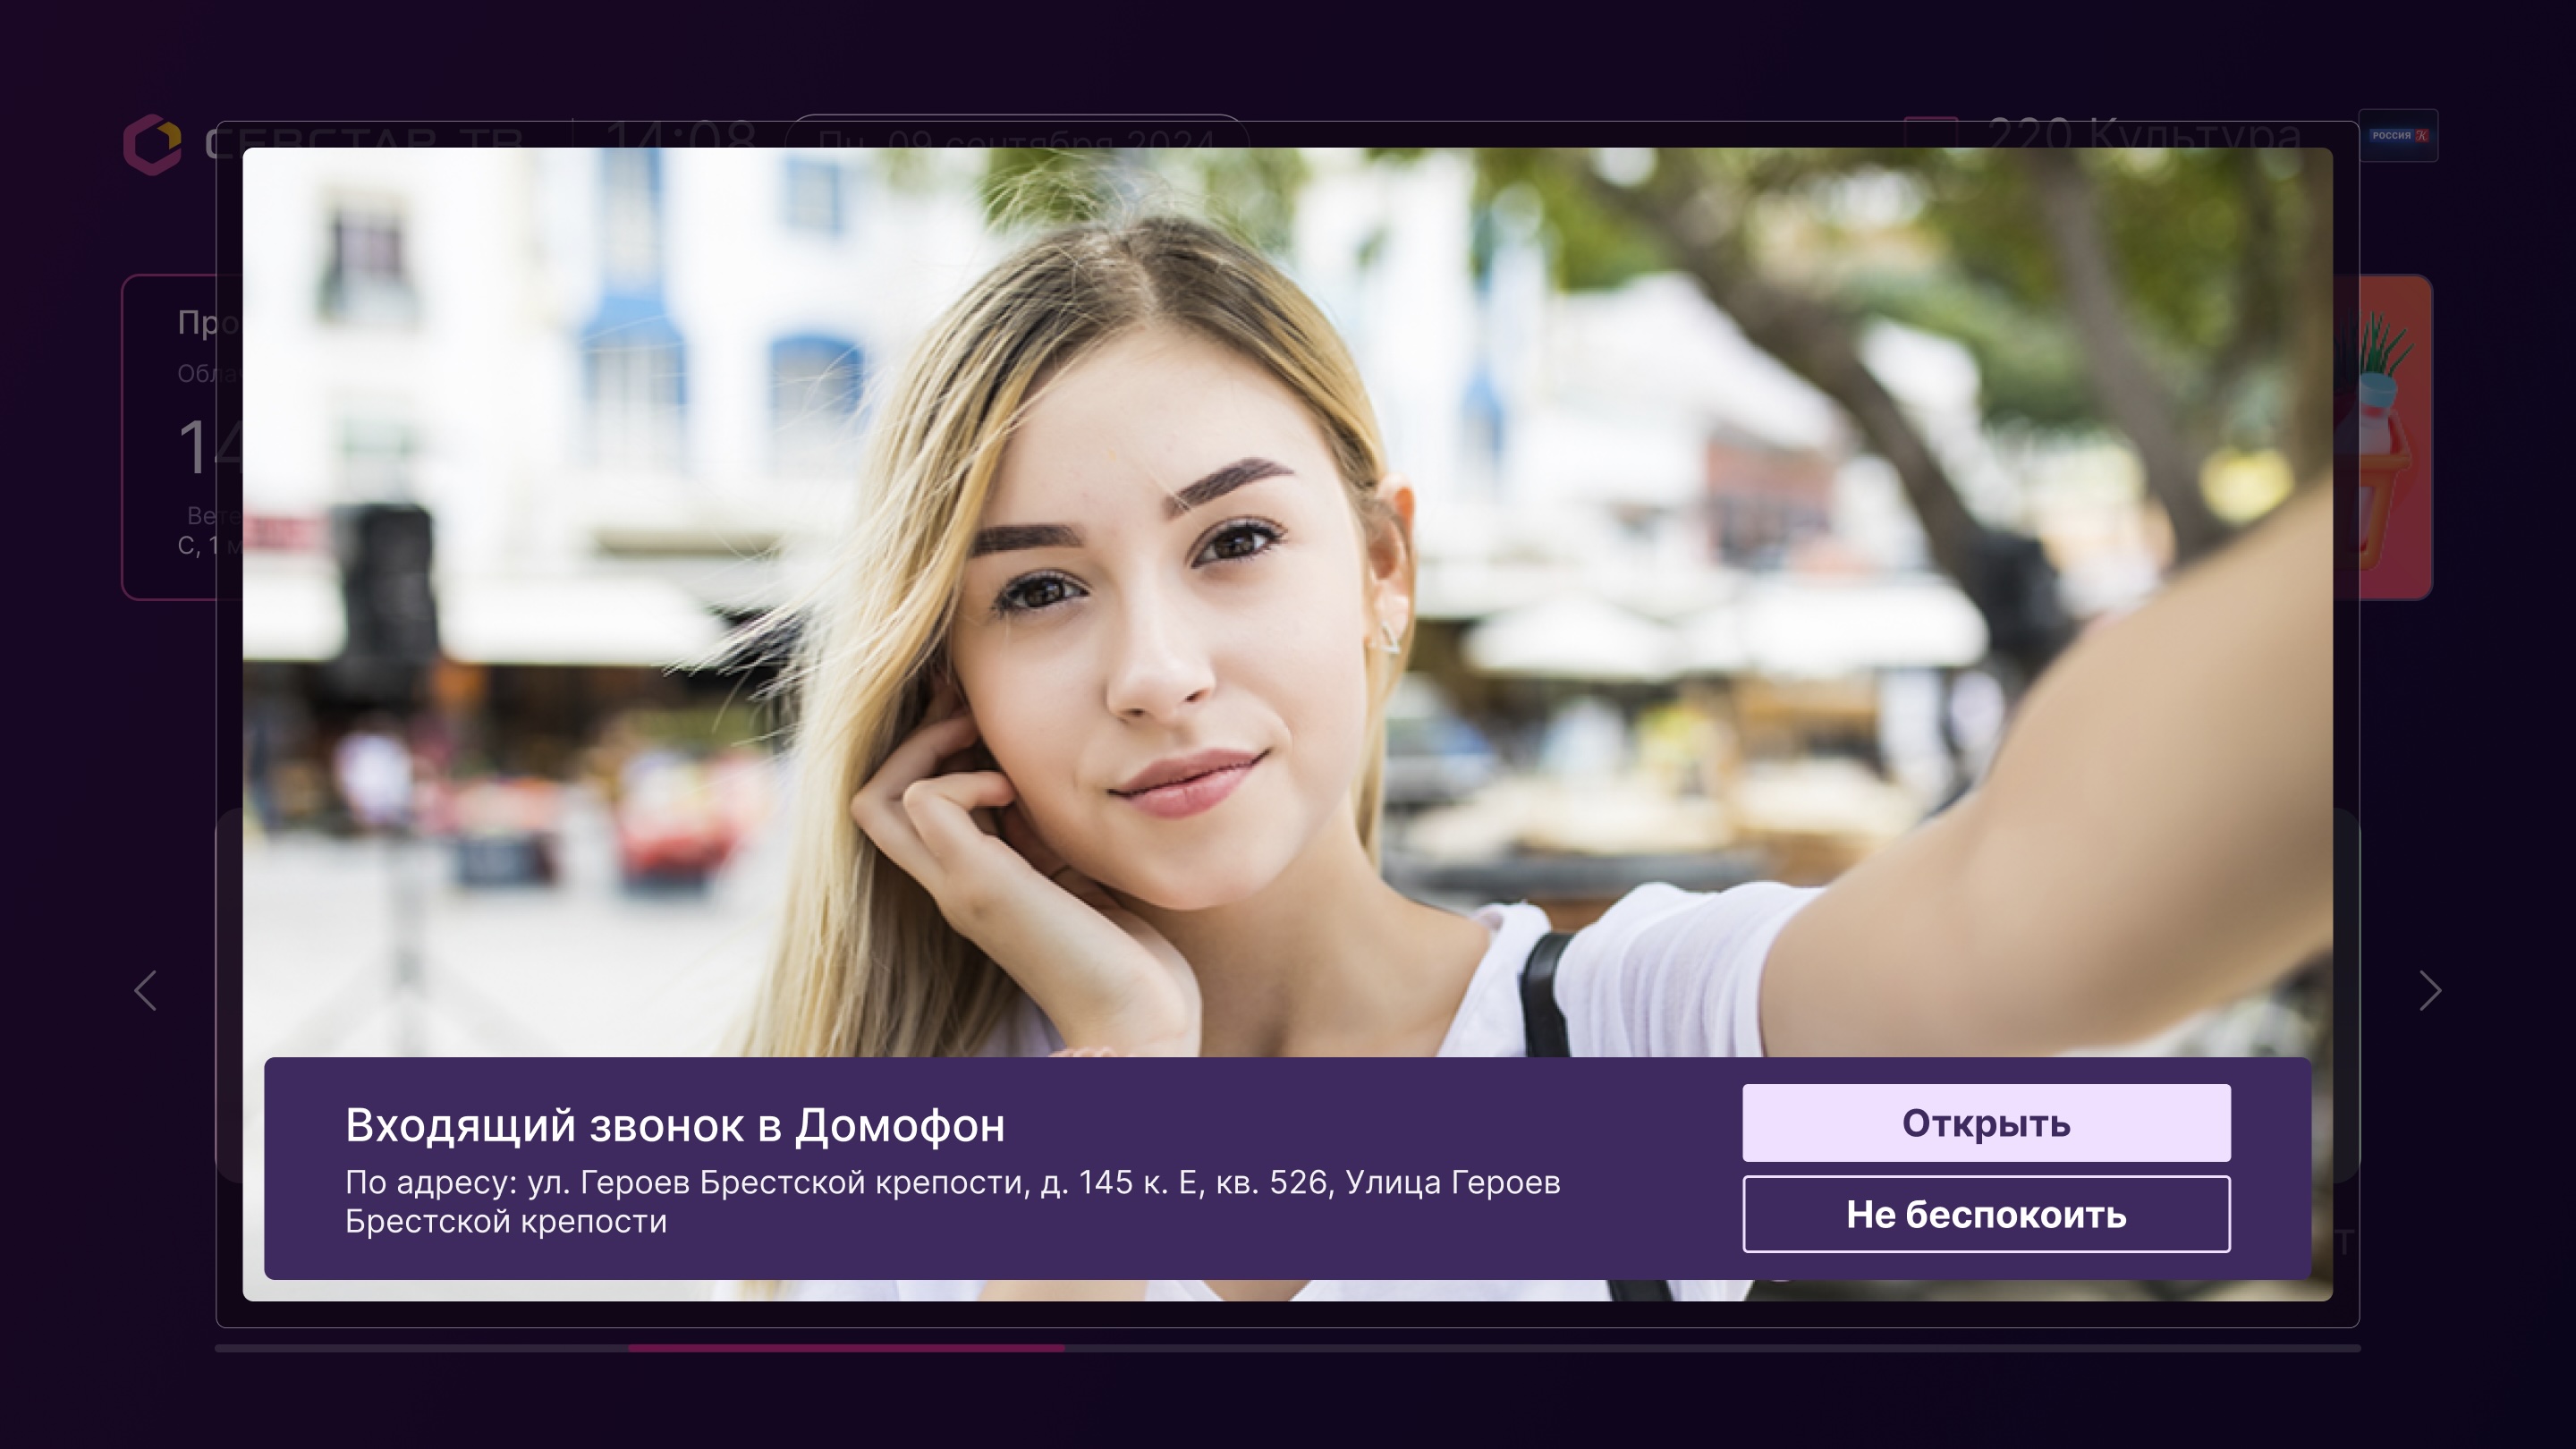
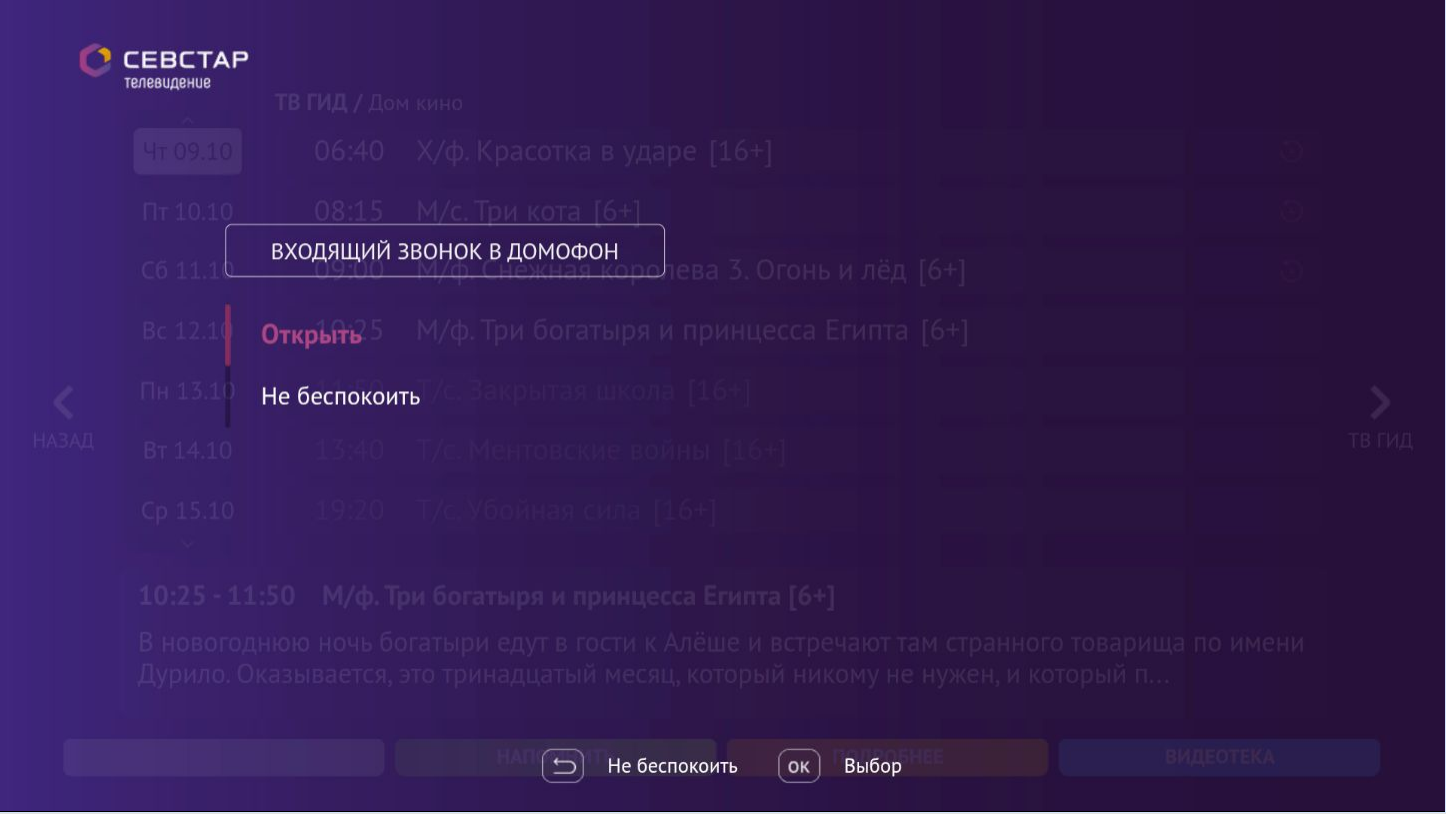
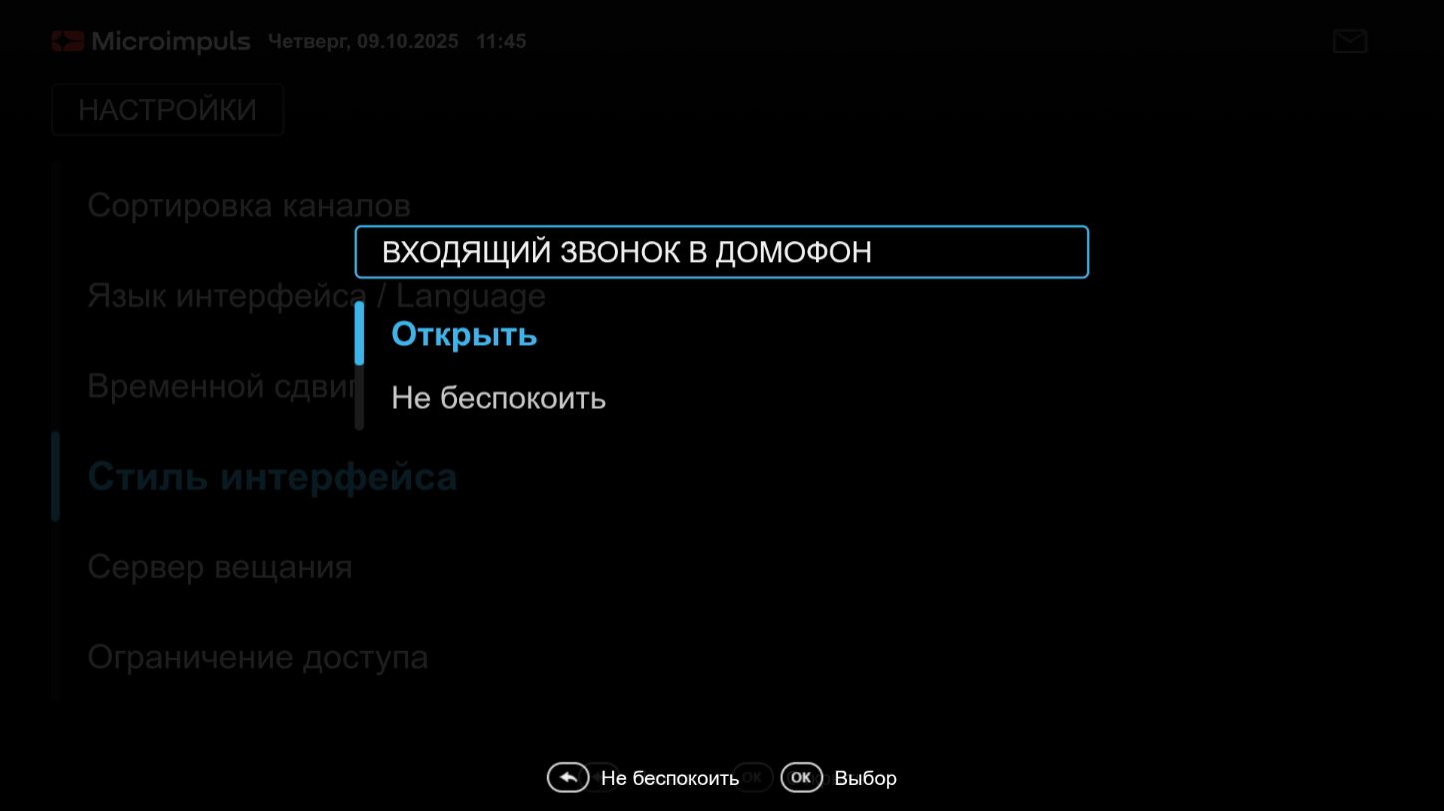
3. The subscriber, pressing the buttons «Open» or «Do Not Disturb», initiates a call to the IPA methods of the intercom system (Open»)open_door_url and reject_intercom_call_url).
Authorization on TV by QR code
Windycast in this integration is used to instantly transfer the authorization session from a mobile application to a TV or console. The subscriber does not need to enter the username and password on a large screen: it is enough to scan the QR code from the phone or enter a short digital code.
The scenario of this integration:
1. The subscriber opens the application on the TV or console and goes to the entrance. A QR code appears on the TV screen. If a digital code display is enabled, a short numeric code is shown next to the QR - it can be entered manually when the camera is not there or the QR is inconvenient to scan.
2. The subscriber opens the mobile application, which is already authorized, and scans the QR code from the TV screen or enters a digital code.
3. After scanning a QR code or entering a digital code, Windycast delivers authorization data to the TV. The TV is in the same account as the phone.
QR sessions are limited in time. If the subscriber did not have time to confirm the entrance, you need to request a new code on the TV.
For the Windycast mechanism to work, it must be installed and configured according to the instructions below: key smart_secret_key in the Windy configuration, it must coincide with SECRET_KEY smarty.
QR authorization settings in Smarty
Options are set in the Smarty configuration file /etc/microimpuls/smarty/smarty.py (or in the custom configuration file). After the change, you need to restart uwsgi: sudo service uwsgi restart.
TVMIDDLEWARE QR LOGIN SESSION TTLQR authorization session life in seconds. After this time, the current QR code or digital code will not be available, the subscriber needs to request a new code on the TV. Data type: int. By default 300.WINDY QR LOGIN TIMEOUTTimeout waiting for a response from Windy upon notification of successful entry, in seconds. Data type: int. By default 5.WINDY QR LOGIN RETRY COUNTThe number of repeated attempts to deliver a successful Windy login event in case of an error. Data type: int. By default 2.WINDY QR LOGIN RETRY DELAYSDelays in seconds between repeated attempts to deliver a Windy login event. It's set as a cortege of values. The position of the value in the motorcade corresponds to the attempt, after which there will be a delay. If the length of the motorcade is less thanWINDY QR LOGIN RETRY COUNTFor missing attempts, the last value of the motorcade is taken. Data type: tuple. By default (0.2, 0.4).TVMIDDLEWARE DEVICE LOGIN CODE ENABLEDThis includes displaying digital code on a TV screen as an alternative to QR scanning. With the value of True, the client receives a fieldlogin codeit can show a short numeric code next to the QR. The code itself is always contained in the QR image, the option only affects the individual display of the code. Data type: bool. By default False.TVMIDDLEWARE DEVICE LOGIN CODE LENGTHThe length of the digital entry code. Data type: int. By default 6.
Example of settings:
TVMIDDLEWARE QR LOGIN SESSION TTL = 300
WINDY QR LOGIN TIMEOUT = 5
WINDY QR LOGIN RETRY COUNT = 2
WINDY QR LOGIN RETRY DELAYS = (0.2, 0.4)
TVMIDDLEWARE DEVICE LOGIN CODE ENABLED = True
TVMIDDLEWARE DEVICE LOGIN CODE LENGTH = 6
Instructions for setting up Windycast
Server requirements
Minimum specifications for a server with 2,000 active connections:
- Processor: 2 cores with a frequency of more than 2.5 GHz
- RAM: 4GB
- ROM: 20 GB
Note 1: You can install Windycast both on a separate machine and on the same server where Smarty is installed.
Note 2: When installing Windycast on a server with Smarty, we recommend that you take into account the requirements for the server characteristics and, if necessary, improve them to the necessary.
Installation
1. You need to update all current components of the service to current versions:
— Smarty (not lower than version 2.6);
— Portal (at least engine 1013 sevstar-x 41, sevstar 243, futuristic 1037);
— Mobile application (assembly date not earlier than 13.12.2021)
2. Install the python3 interpreter. 10
- We install system packages:
apt update
apt install build-essential zlib1g-dev libncurses5-dev libgdbm-dev libnss3-dev libssl-dev libreadline-dev libffi-dev libsqlite3-dev w libbz2-dev
- Download the source code of the interpreter from the official website and unpack it:
wget https://www.python.org/ftp/python/3.10.18/Python-3.10.18.tgz
tar -xf Python-3.10.*.tgz
- We configure the compilation parameters and assemble the interpreter:
cd Python-3.10
. /configure --enable-optimizations
make-j 2
make altinstall
3. Next, download the Windy installation package and install it:
dpkg -i windy*.deb4. Fill in the Windy configuration file located at /etc/microimpuls/windy/windy.ini, settings to configure:
smarty_url— local url Smartysmart_secret_key— parameterSECRET_KEYin Smarty settings (without quotes)
Example configuration:
# Need to be equal with SECRET in Smarty config
smarty_secret_key = 123

# Need to be available from Windy
smarty_url = http://127.0.0.1:8180
5. Set up a virtual environment and establish dependencies
- Create a virtual environment:
cd /usr/share/microimpuls/
python3.10 -m venv windy_venv
cd windy_venv
ln -s /usr/share/microimpuls/windy
- Installing Python packages:
/usr/share/microimpuls/windy/venv/bin/pip3 install -r /usr/share/microimpuls/windy_venv/windy/requirements.txt
- In the file
/lib/systemd/system/windy.servicechange the values of the working directory parameters and launch parameters:
WorkingDirectory=/usr/share/microimpuls/windy_venv/windy/
ExecStart=/usr/share/microimpuls/windy_venv/bin/python3.10 windy.py
- In order for the changes to come into force, the following command must be executed:
systemctl-daemon reload
- Turn on auto-start service and restart it:
systemctl enable windy
systemctl restart windy
6. Customize nginx
- Include configuration in nginx:
ln -s /etc/nginx/sites-available/windy /etc/nginx/sites-enabled
- Create a directory for logs:
mkdir /var/log/nginx/microimpuls/windy
chown www-data /var/log/nginx/microimpuls/windy
- Check the configuration for errors:
systemctl nginx configtest
- If there are no errors in the configuration, you can restart the configurations:
systemctl nginx reload
6. The final configuration step of — is to configure client applications to interact with Windy:
- in the client.js portal or on the portal configuration page in the Smarty administration panel, you must register the option
windy_url, the value of which is formed according to the following scheme:ws:// + windy_host + : + windy_port + /wsfor example:
'windy_url': 'ws://example.com:8888/ws',
- the same option must be entered in the configuration of mobile applications on the application configuration page in the Smarty administration panel, or specify this address as a build option.
6. After correctly configuring all points in the applications, the functionality described above will appear, and http:// + windy_host + : + windy_port + /status it will be possible to track devices connected to Windy.
Additional settings for Windycast
- Option
save_windy_devicesfor client.js of the Futuristic & #8212 template; when true devices previously connected to the TV/set-top box via Windycast do not require reconfirmation when connected. Default value: falsely.
var CLIENT_SETTINGS = {
///...
'save_windy_devices': true
};- The inclusion of the functionality of receiving intercom messages is carried out using special setters in client.js & #8212; through the listing of tariff plan identifiers.
if (App.popupIntercomScreen) {
// SupportedTariffIds - id tariffs in which intercom is supported, if there is no tariff, then even windyCast will not be connected, since for other purposes in the template is not used.
App.popupIntercomScreen.setSupportedTariffIds([461, 22]);
}- Additional setters for configuring the behavior of the message from the intercom:
if (App.popupIntercomScreen) {
ScreenHideInactivityDelay - after what time will the poppe call disappear
App.popupIntercomScreen.setScreenHideInactivityDelay(180); // in seconds, minimum 5 seconds, default 3 minutes
NotDisturbingDelay - how long after pressing "do not disturb" or closing pop-up calls in the template will be ignored
App.popupIntercomScreen.setNotDisturbingDelay(300); // in seconds, at least 0 seconds, that is, you can completely disable, default 5 minutes
ImageChangeInterval - refresh rate of the image from the camera
if (App.popupIntercomScreen.setImageChangeInterval instanceof Function)
App.popupIntercomScreen.setImageChangeInterval(200); // in milliseconds, range [200ms, 10sec)
}
}
Instructions for setting up Windycast for residents of the Plus TV app
The instructions fully coincide with the previous one, except that the mobile app Plus TV and the portal have already been assembled and published in the markets with the desired version.
